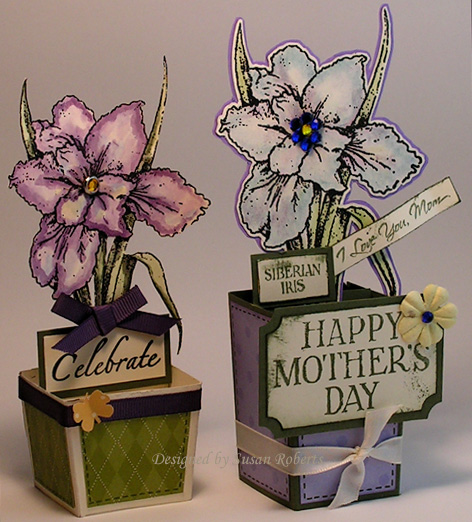
My “Siberian Iris” set from Fourishes arrived yesterday! Couldn’t wait to play with it! I made a couple of fun little baskets.
I took some pictures along the way in case anyone wants to make one, too.
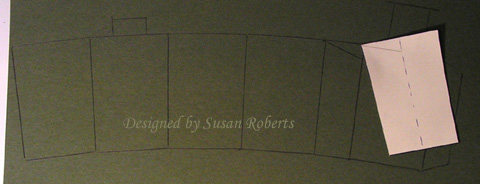
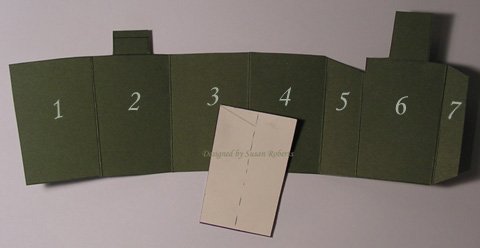
First decide what size and shape you want your “basket” to be. Here are some examples or ideas. I also included a template with each section numbered 1-7.

You will need to make and cut out a template of your desired basket shape. Then trace around it 4 times placing each one side to side. On the 5th section do only 1/2 (or a little less) of the basket shape. Then do one more full basket shape and finally a 7th section which is just a tab for gluing. This 7th section should be less than 1/2 the width of your template (and the same width or less of section #5). Be sure to add a couple of tabs on sections #2 and #6 with the #6 tab being a little taller. If you want to have three decorated sections, add another tab to section #4. This tab should be the tallest of the three as it will be the back row. Cut out your basket and score all the sides. Fold the basket so that the tracing lines will be on the inside of the basket.
To add patterned paper, make another template that is 1/4″ less in height and width than your basket template. Trace 4 of this smaller basket shape on the back of whatever patterned paper you are using. (This step is optional. You can, of course, stamp images on the basket or even leave it plain.) Turn your cut out basket over so that all the tracing marks (if you have them like mine does…) and adhere your patterned paper to sections #1-4.
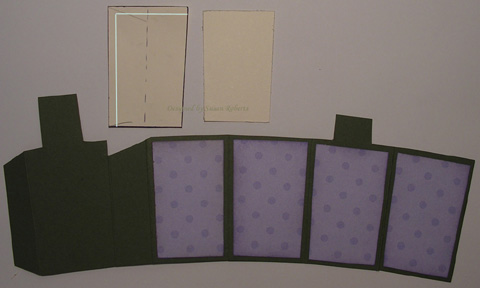
Apply adhesive to the outside of sections #5 and #7.
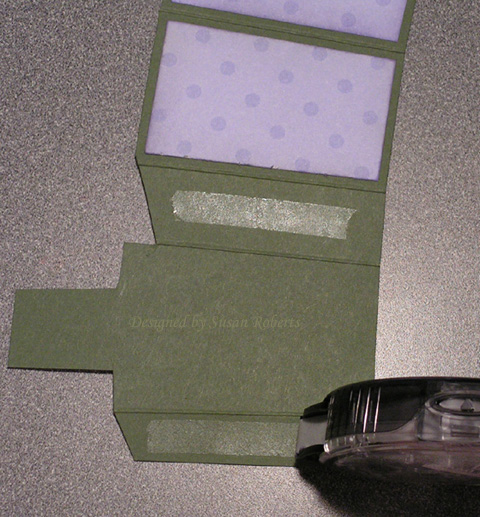
Adhere section #7 to the inside of section #3 to form a rectangle. (If section #7 is smaller than section #5, make sure it is glued on section #3 far enough away from section #4 so it equals the measurement of section #5 and forms a rectangle.)
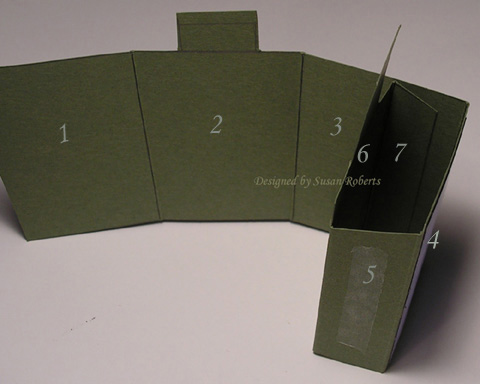
Adhere section #1 to the outside of section #5.
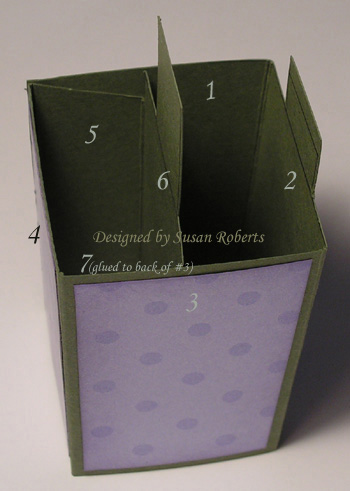
Make sure that your sections will fold flat for mailing.
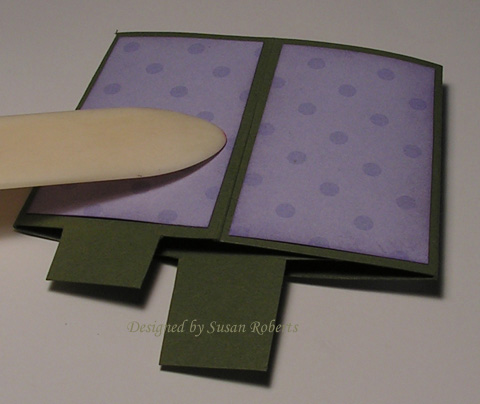
Decorate as desired!
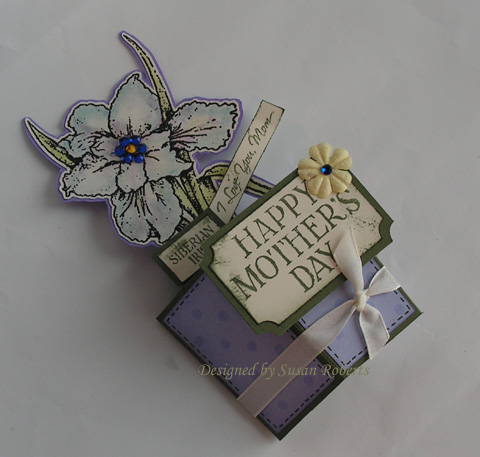
Basket 1 – Celebrate
Stamps: “Siberian Iris” and “Many Sentiments” both sets from Flourishes
Papers: Always Artichoke, Very Vanilla, DP is SU! “Prints”
Inks: Jet Black Stazon, Always Artichoke Marker, Reinkers in Always Artichoke, Old Olive, So Saffron, Bashful Blue, Elegant Eggplant
Accessories: Eggplant GG Ribbon, Rhinestone Brad, Butterfly Punch
Basket 2 – Happy Mother’s Day
Stamps: “Siberian Iris” from Flourishes
Papers: Always Artichoke, Lavender Lace, Very Vanilla, DP is SU! “Prints”
Inks: Always Artichoke, Lavender Lace, Always Artichoke Marker, Versamark, Chalks in Lavender Lace, Almost Amethyst, Bashful Blue, Not Quite Navy, Always Artichoke, Old Olive
Accessories: Black Embossing Powder, Rhinestones, Prima, Very Vanilla Taffeta Ribbon, Ticket Punch
**These little baskets were designed using a folding technique from a card in my mother’s vintage collection. It was a Hallmark Historical Collection card and was a reproduction of a card printed in the late 1800’s by Raphael Tuck & Sons, London.**
