Stampin’ Up! has a beautiful new embossing folder. I love it!
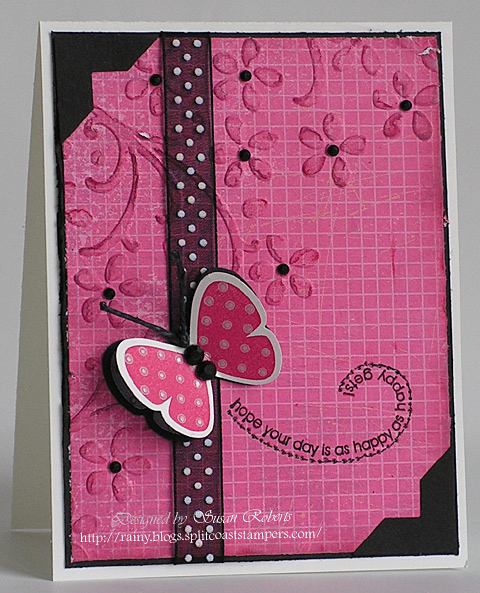
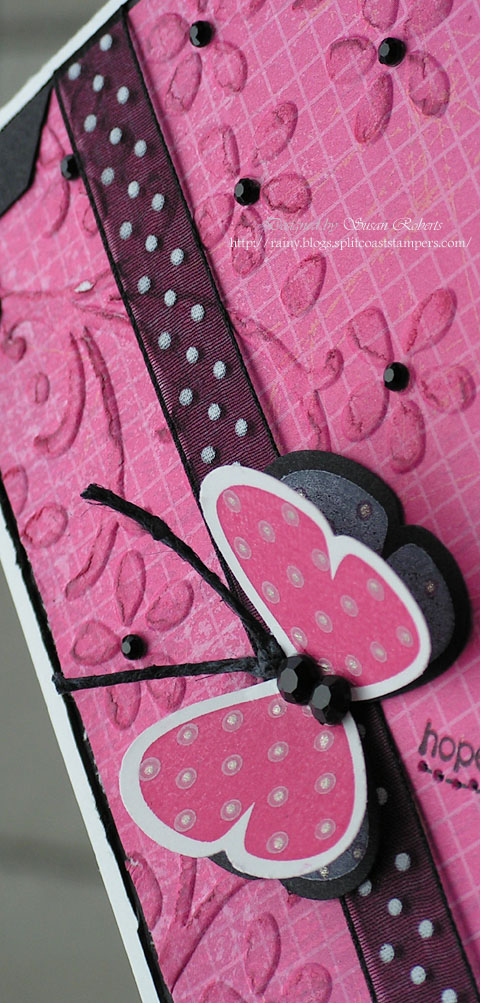
To get a distressed look on the raised portions of the embossing I have, in the past, either sponged the ink on or just applied the ink directly from the ink pad. This worked okay but some ink still managed to find its way onto the areas that had not been embossed. Recently I tried inking up my mirror image stamp and running that over the embossing. It worked like a charm!! I was so excited. Because the rubber is hard and flat the stamp touches only the raised portions of the card stock. NO ink is able to escape the embossing!
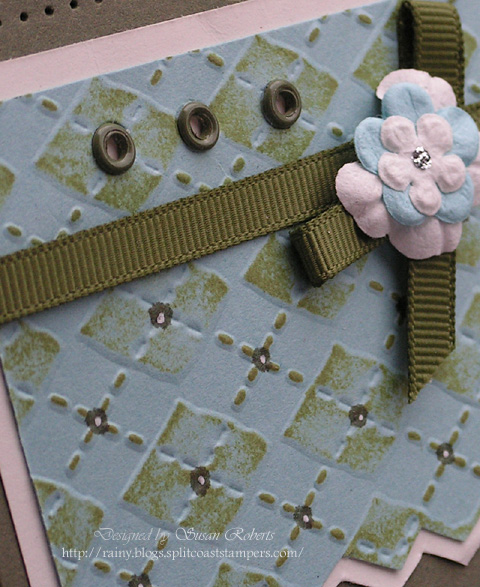
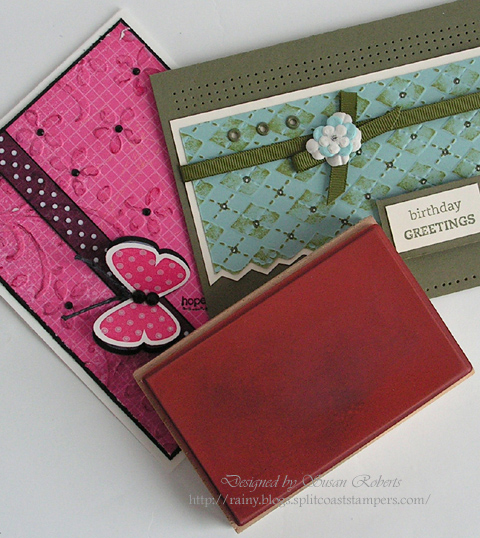
Here is another card using a Cuttlebug embossing folder.
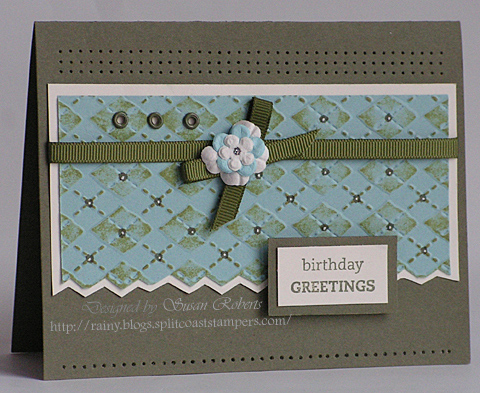
See!! Absolutely no ink anywhere except on the embossing!
Perhaps everyone already knew about this technique? But I was so excited about it that I had to share it anyway. LOL
Happy Crafting!
——————————
Pink Butterfly Card:
Stamps: SU! “Flight of the Butterfly”; Rubber Stampede Mirror Image Stamp
Papers: SU! Whisper White, Basic Black; “Razzleberry Lemonade” DSP
Inks: SU! White Craft, Rose Red Classic, Basic Black Marker; ClearStar Glitter Pen; Black Gel Pen
Accessories: May Arts Ribbon; Kaiser Rhinestones; SU! Hemp Twine, Piercing Tool and Template, Butterfly Punch, Photo Corners Punch, “Elegant Borders” Embossing Folder
——————————-
Green Argyle Card:
Stamps: SU! “On Your Birthday”; Rubber Stampede Mirror Image Stamp
Papers: SU! Always Artichoke, Baja Breeze, Very Vanilla
Inks: SU! Always Artichoke, Certainly Celery; White Gel Pen
Accessories: SU! GG Ribbon, Piercing Tool and Template, Always Artichoke Eyelets; Cuttlebug “Argyle” Embossing Folder; Primas; Stickles


WOW Susan … this is an awesome idea!!! Now why didn’t I think of that???? LOL!! Sure glad you did though … certainly will be using it soon!
BTW … your cards are both awesome! I’ve seen these new dies … guess I need to make yet ANOTHER SU purchase … you enabler you!!! Have a great day! Thanks for inspiration!
This technique looks gorgeous! Thank you so much for sharing!
Super cool, this is very creative and neat looking!
Tricky! Glad you explained the mirror image part as I was not getting it until I saw the stamp. To me that’s just a shadow stamp but if I want to sound intellegent I will now call it a mirror image. TFS and I do love your work as always. Pat
Beautiful showcasing of this technique Susan! They both look so cool!
Beautiful charming cards. Thank you for sharing the technique with the mirror stamp.
Hugs Anja
Cool beans! You are a genius — what a fab idea.
Oops! I forget to mention that you cards look terrific!
OMG – these are great cards using the new SU Texturz Plates………..love th color combo, too – may have to CASE…thanks for sharing….xoxo, Patti
What a fantastic tip, Susan! Thanks so much for sharing it with us! It looks like it worked like a charm on your beautiful cards, and I love all the detail you put on them…bits of bling, inked center points, brads, layered butterfly –you think of everything!
I am SO happy that you shared this technique. I had wondered how to do this and so I, for one, am very excited to give it a try. THANKS so much for sharing! AWESOME cards, indeed.
How freakin cool is this?! Now where did I that that mirror stamp?
What is a mirror image stamp and where do you get one?? Sounds great and your cards are wonderful!!! Thanks for sharing.
How brilliant! What a clever idea and gorgeous cards. Hope it’s okay if I link you? Thanks for the inspiration! :O)
Susan, what a cool idea! I would have never thought of this…I got rid of my mirror image stamp a long time ago…will have to come up w/something else to use. I love that new embossing folder…mine is coming this week! Your cards using this technique are so cool, gf!
TFS a wonderful new technique! I never bought a mirror stamp, perhaps I might want to now:) Both cards are lovely, but that butterfly is just so beautiful!!
These are beautiful, Susan! What a great idea! Thanks for the tip!
These are so neat, and I like the effect of inking the embossing!
Oh, great idea. I’m sure I have some scrap rubber I can mount on a block for this. Love the butterfly card.
Great idea, Susan. I hadn’t thought of doing it that way, but it sounds full-proof. I have done it with a brayer, and at least on a larger design it seems to work. Not sure if it works with the brayer on the smaller designs, like the Swiss Dots, for instance. Thanks for the tip. Your cards are lovely.
Wonderful technique, and your cards are so beautiful!! I have that mirror image stamp to, but never use it. Hmmm.
Love your butterfly! I didn’t think I needed that set & punch but I’m slowly changing my mind.
Great designs!!! These are so fun!
THANK YOU!!! You have NO idea how aggravated I was getting with the whole ink-where-it’s-not-supposed-to-be thing on embossed papers! Brilliance! I’ve looked around your blog quite a bit and decided I need regular updates – I’ve added you to Google Reader, so I don’t miss any of your genius.. Thanks again!
Pretty!!
Thanks, Susan, had no clue about using the mirror stamp! Very sweet cards, TFS it all!!!
[…] Call” Cuttlebug embossing folder to dry emboss the image over it. After inking up my mirror stamp, I ran it over the embossing to highlight it. I also sponged around the […]
[…] Here are a couple of cards I made using an emboss and stamp technique where only the embossed areas receive any ink. In both instances the cardstock was dry embossed using a Cuttlebug embossing folder. Then the embossed or raised areas were stamped. (Read more about it here.) […]