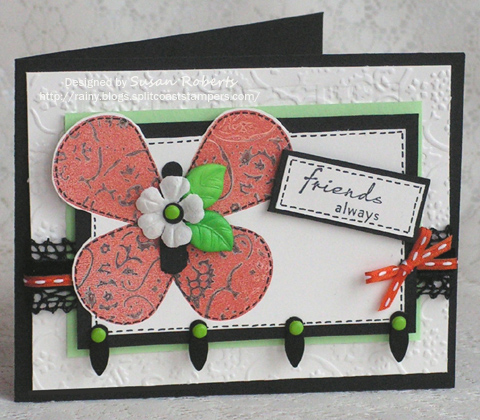
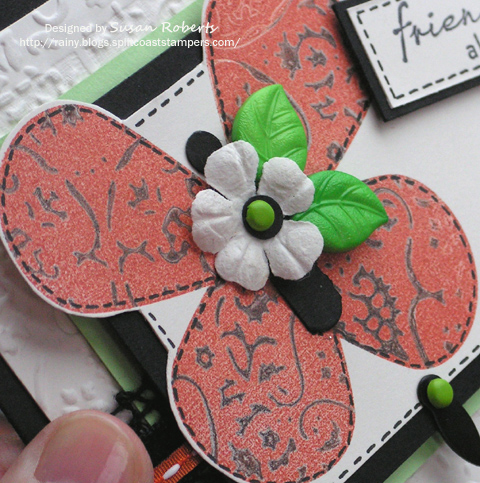
It’s no secret that I love my embossing folders. Well in playing around with them today, I tried something that was (at least for me) something new. I created a quick tutorial to show you what I did. But first here’s the card I made.
This card fits into a couple of different challenges out there in blogland this week. First is the Sketch Challenge over at Waltzing Mouse Stamps. The butterfly was made with one of the tree images from their “Teeny Trees” set. The other challenge can be found at Our Creative Corner. The challenge is called “All the B’s”. There are four elements that must be included on your project: Black, Bling, Buttons and Bows.
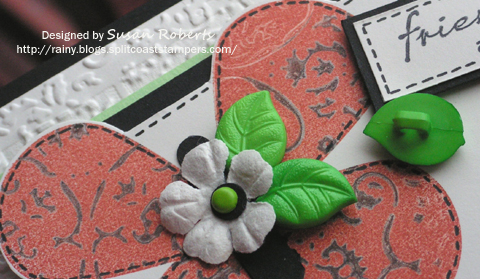
The black and bow elements are obvious, the bling includes lots of brads and frame anchors and the buttons are the leaves. I clipped off the plastic loop on the back of the buttons to allow them to lay flat on the card.
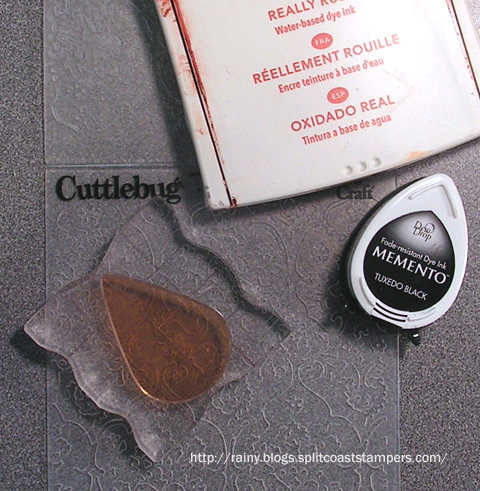
Now to the embossed kissing thing that was so fun! I started with a couple of different inks, a solid image stamp and Cuttlebug’s Textile Embossing Folder.
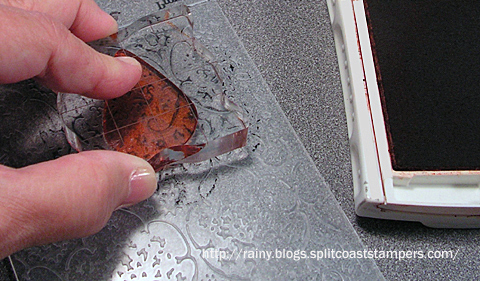
I inked up a small area of the embossing folder with the darker of the two inks, Memento’s Tuxedo Black.
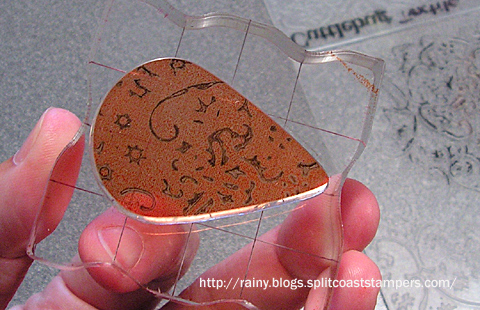
Then after inking the solid image stamp with the lighter ink (in this case SU’s Really Rust), I stamped (kissed) it directly onto the inked area of the embossing folder.
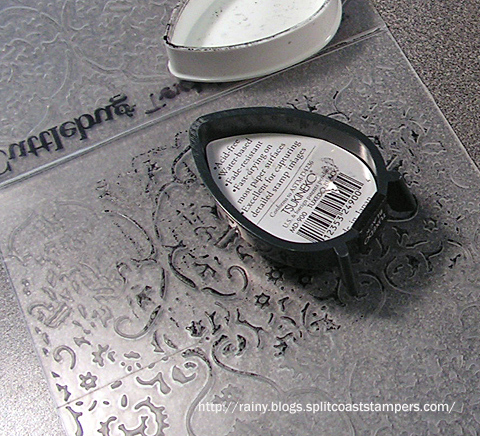
Here is the result.
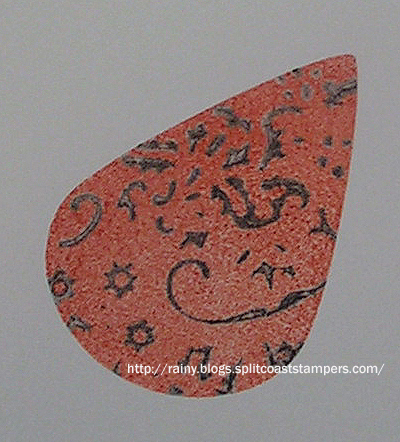
Then I immediately stamped it onto the cardstock.
The entire process was repeated until I had a butterfly. It could have just as easily been a large blossom or even a funky tree!
I can hardly wait to try this with some of my other embossing folders!
Thanks for dropping by today. Happy Crafting!
——————————
Stamps: Waltzing Mouse Teeny Trees
Papers: Papertrey Ink Vintage Cream and True Black; SU Gable Green
Inks: Memento Tuxedo Black; SU Really Rust; Gel Pen
Accessories: Cuttlebug Textile Embossing Folder; Velvet and Lace Ribbon; Stitched Grosgrain Ribbon; Prima; Leaf Loop Buttons; Photo Anchors; Brads; SU Window Punch and 1/4-Inch Circle Punch

































Susan, you are a genius! What a fabulous variation of the kissing technique. Love the results. Your card is the bomb!
that is a neat technique – thanks for showing!
Oh such a pretty effect. I used to do that with my BG stamps, but never thought to do it with those pretty folders.
Well, that’s very cool, Susan! The pattern turned out so distinct. I love your darling butterfly with the pretty flower and leaf buttons, too! Cute!
ACK, that is the coolest idea for the kissing technique ever! (Read that sentence over again, it’s pretty funny 😉 Amazing card, Susan! I love those colors and the fun way you used those little tabs along the bottom. The green leaf buttons are too cool and really pop with your whole design.
What a cool technique Susan! Kissing with the embossing folder! Love how you created your butterfly with the tree stamp! Thanks for playing with the WMS sketch this week!
Holy Clever! Plus I love that the wings go “off” and all you did was trim around a bit of it! The card is super cute, TFS! 🙂
So cool! Beautiful card and great technique!
Awesome technique, Susan! Love it and I’m going to give it a try. Thanks for sharing!!
How cool is this…I love your technique, Susan…your card is fabulous!!!!! I’ll have to give this a try!!!
Great technique, Susan and a beautiful card!
What a clever idea!!
Susan this is a fabulous idea! I can’t wait to give it a go with so many different stamps & EFs. I know my club gals will want to try it out. Lovely card and perfect for your new kiss technique.
Wow…..what a great idea!! Thanks for sharing 🙂
very cool technique and like how you used the photo anchors!
I’m slapping my forehead and wondering why I never thought of doing this when I ink up my embossing folders! Thank goodness you’re a genius who brought it to life for the rest of us 🙂 This is one fantastic idea, and I love your card, especially the photo turns!
What a fabulous card Susan and I really love the technique you’ve used – sooooooo clever!!!
Love the technique, and the card too thanks for sharing
Fabulous idea, Susan!
What a fantastic idea to use embossing folder for stamping impression! How clever and how gorgeous it looks on the card! Thank you so much for sharing your amazing talent with us, Susan!
This has to be the coolest thing EVER! Love it!!!
Brilliant, Susan! I will be giving this a try in a few minutes!! Love!
Just brilliant. I tried it out with the only solid stamp I have (a circle) and it gives a whole new use for the embossing folders I have
Thanks for you super idea
This is really a cool idea. Thanks for sharing.
Great tutorial- what a fun idea!
Thanks for showing such a great tutorial – this looks like a technique everyone could use. Cant wait to give it a try! CoB
BRILLIANT tutorial and idea. THANKS!
This is a wonderful and easy technique! I think even I can do this!
Thank you so much for coming up with this great idea and sharing it with us over at SCS!
He IS Able!
Traci S.